In this post, I will be addressing the top most useful blending modes along with some practical ways to put them to good use for anyone whether you’re a beginner at learning Photoshop or helpful tips for more advanced users.
*Note: Click photos to view them larger
Basic Overview
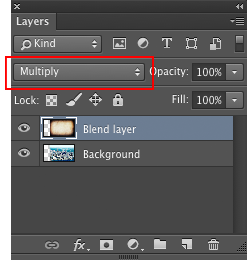
Take a look at your layers palette and the drop-down menu beside “opacity” is full of all the blend modes. If you can’t find your layers palette, go to the very top and click on Windows>Layer to make the palette appear.
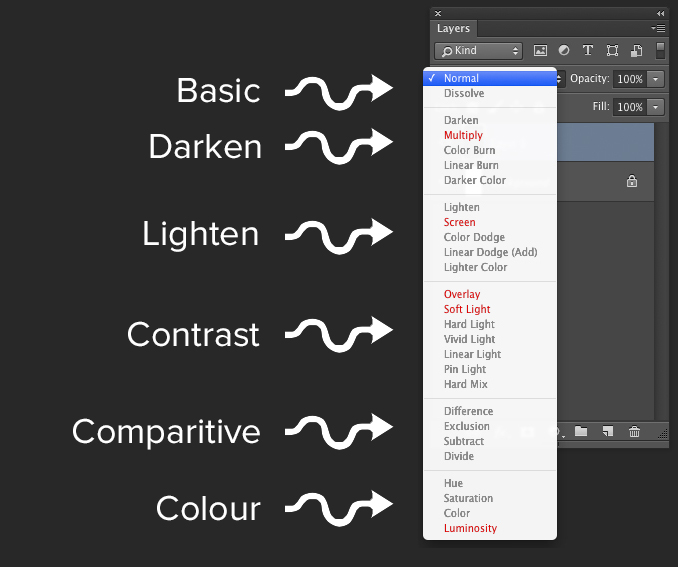
As you may have noticed, the blend modes are separated into their own groups and it’s because more or less, each group is responsible for a certain type of effect. In this post I’ll be touching base on the most useful blend mode (the blend modes highlighted in red) in every section except comparative as it is rarely used except under specific circumstances. When you know one blend mode in a section, then you’ll understand how the rest work as well when experimenting.

If you want the layer to have an effect on the layers below it, you would need to make sure that that blend layer sits on top of your other layers. Placing the blend layer below the background layer will cause the blend layer to have no effect on the layers above it. Ordering your layers are key especially if you are stacking multiple blend layers on top of each other with different blend modes.
Blend modes are very convenient to understand and require you to have at least two layers: 1 or more to act as the background and 1 to act as the blend layer, which we’ll be changing the blend mode of. That’s it for basics, now onto the fun stuff.
Blend mode: Multiply
This darkening blend mode makes changes based off how dark the pixels are and how light the pixels are on the background layer. Basically, black on the blend layer will stay opaque while anything white will be transparent.
This mode is most often used when you want to get rid of a white background in an image in a simple step, when you want to add shadows, or when you want to colour in line art.
Example #1: Vintage vignette
This vignette texture will act as a blend layer while the Toronto skyline is the background that we want the effect to take place on.
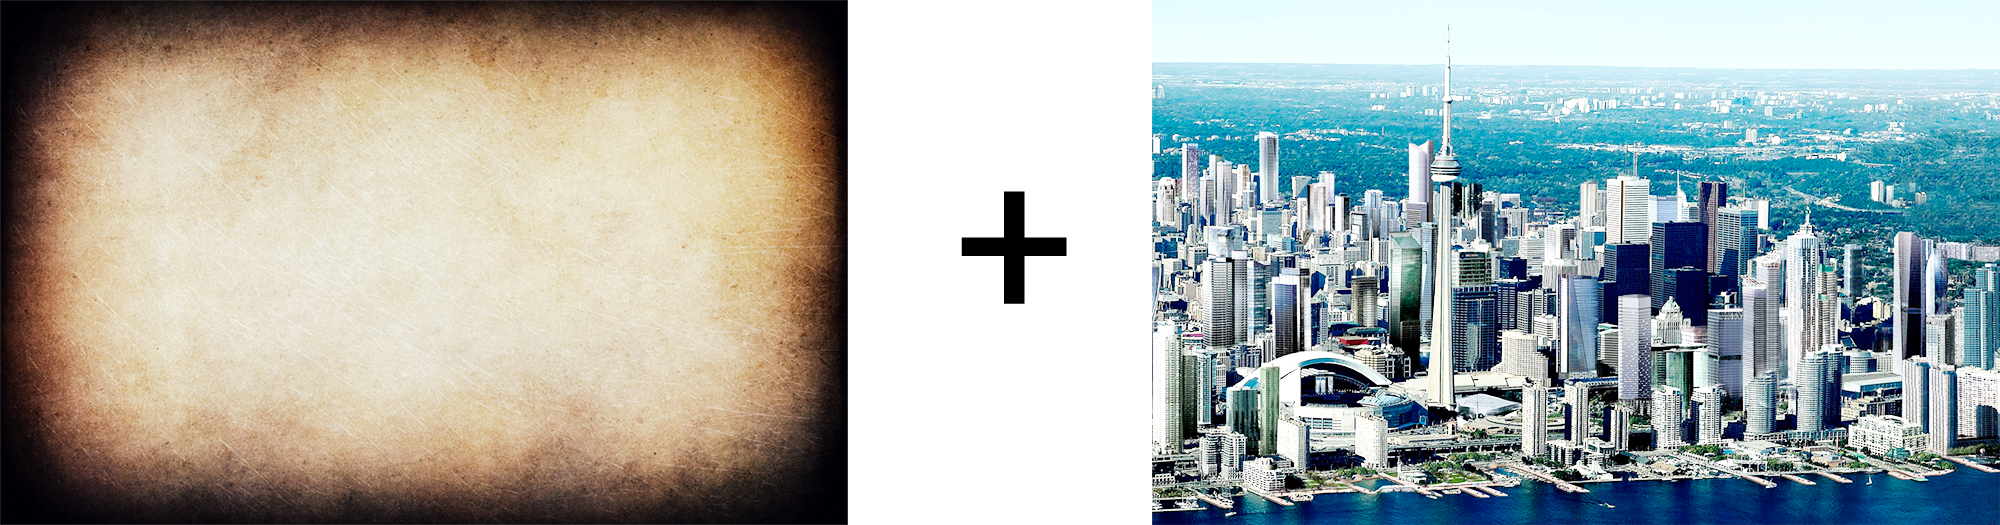

As you can see, the black in this demonstration is completely opaque while the lighter pixels in the center reveal the layer below it.
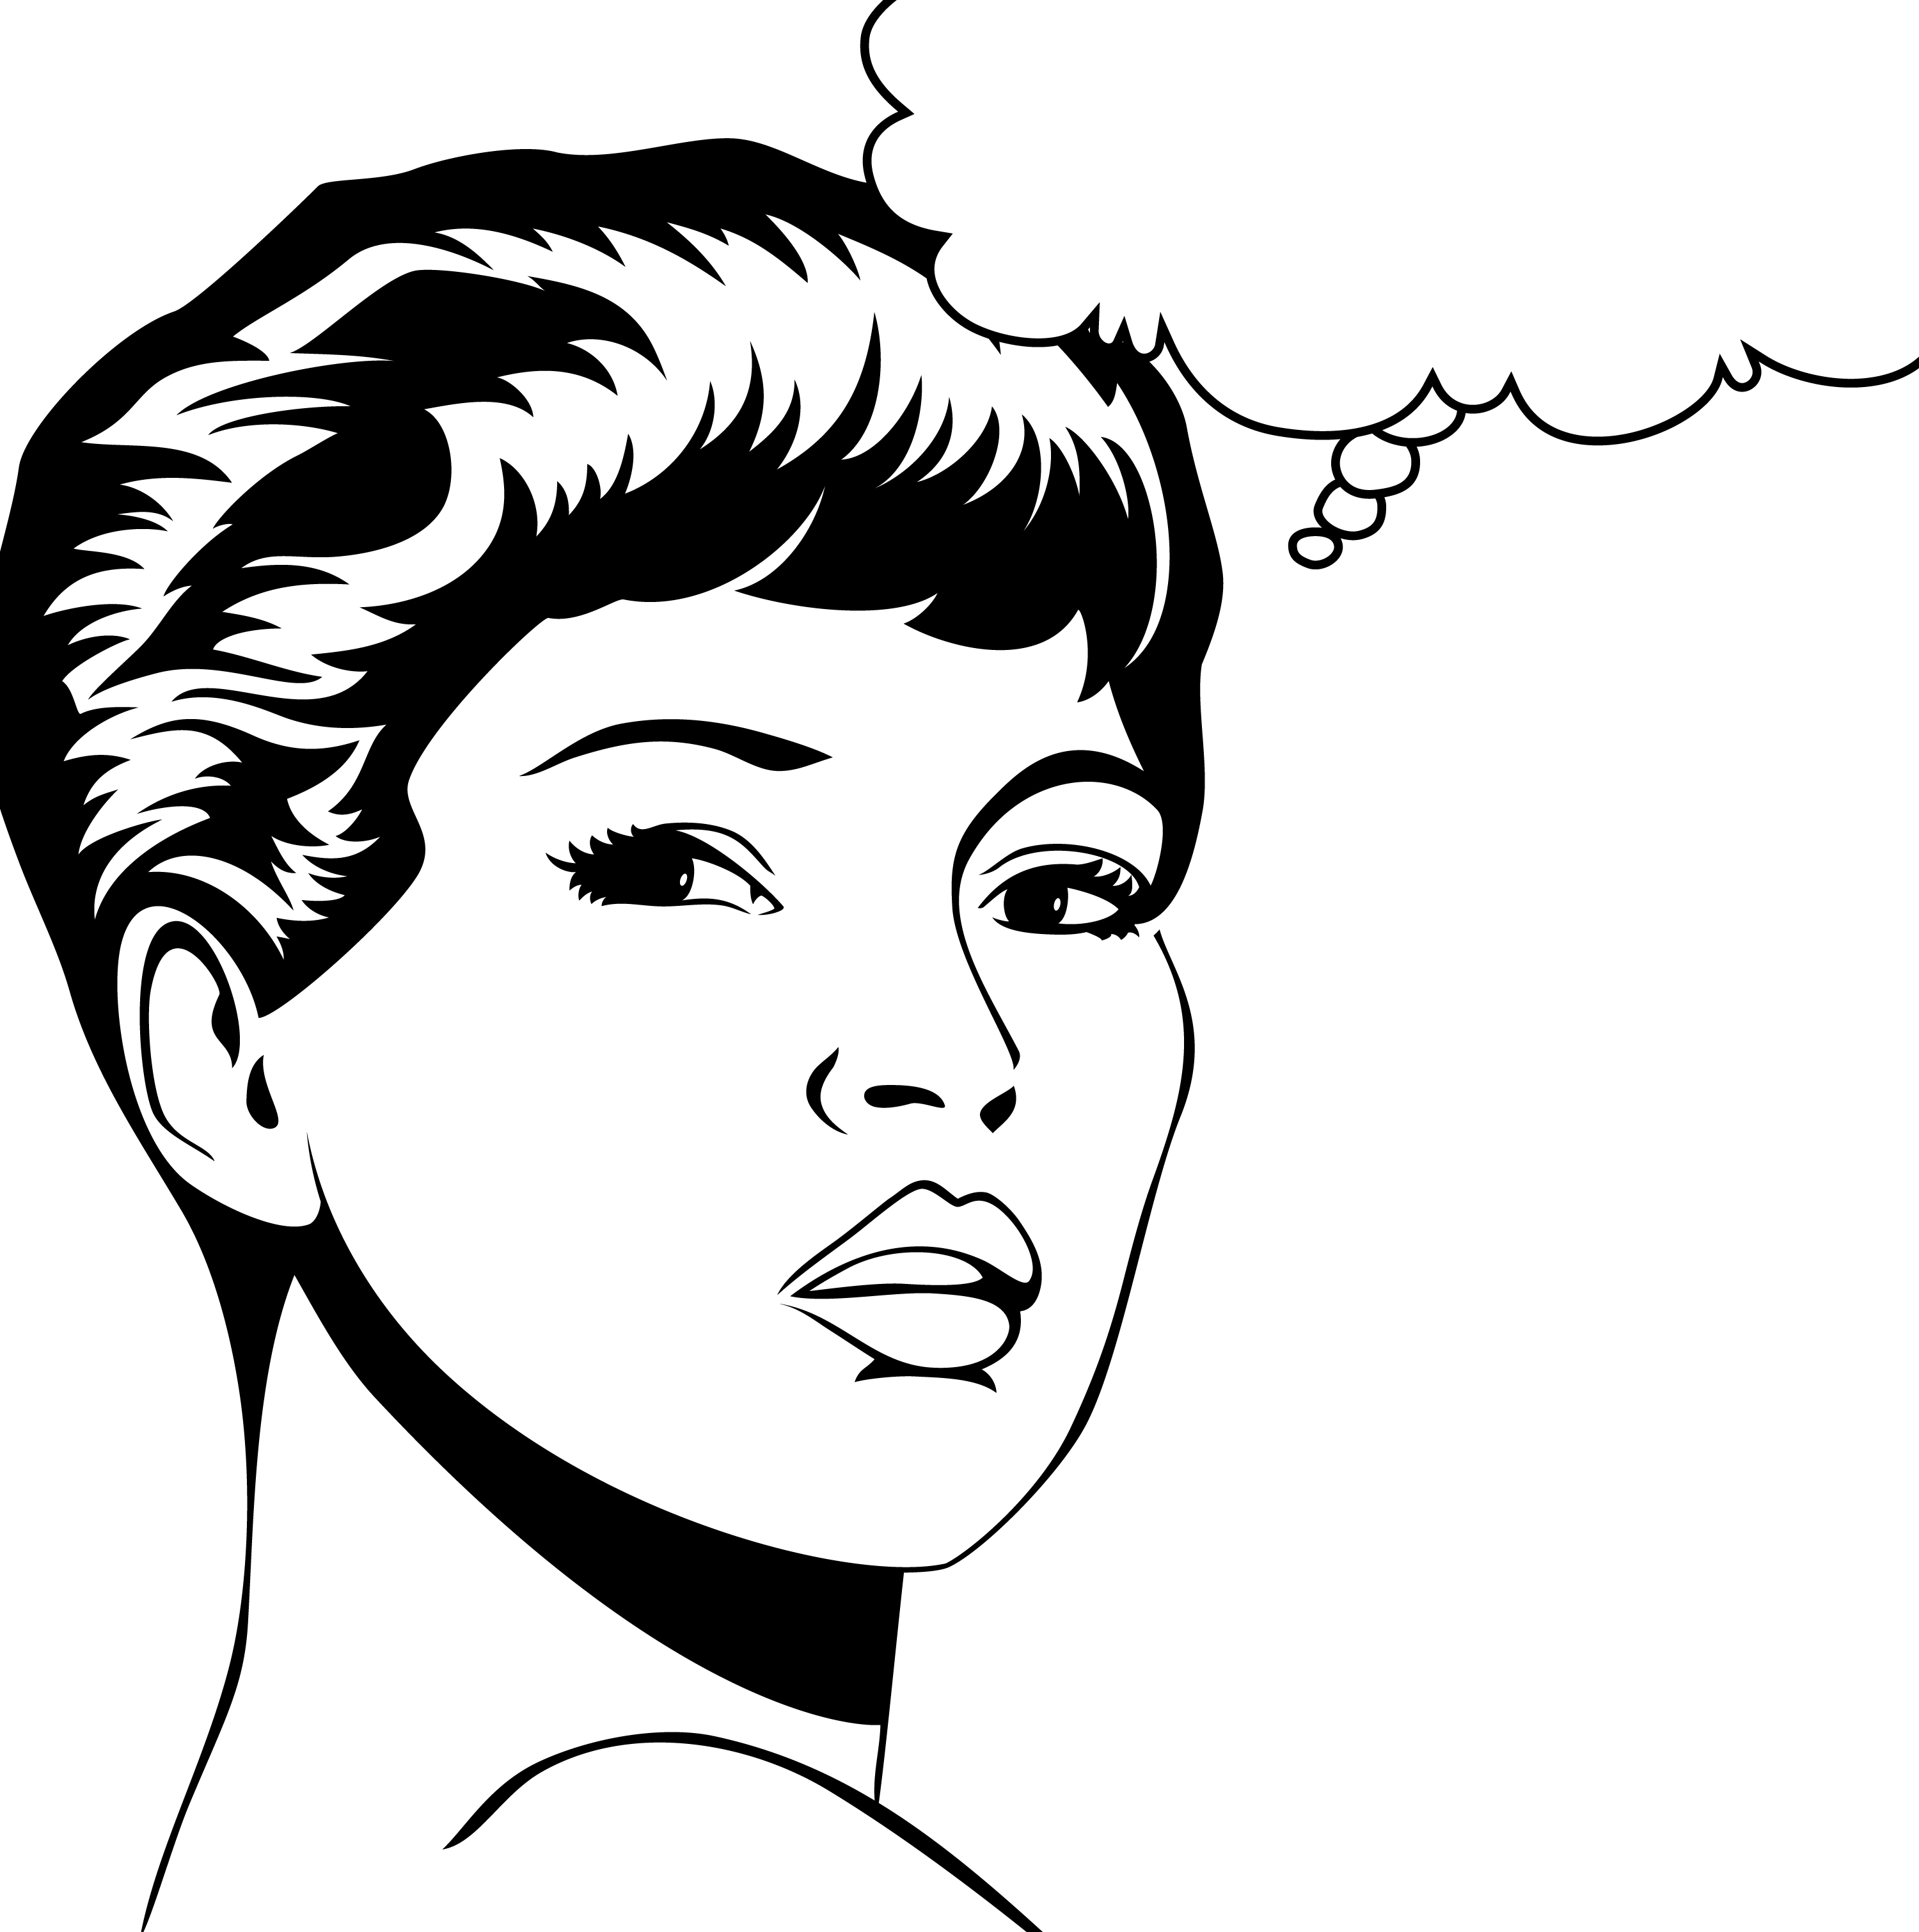
Example #2: Colour black and white images
Say you have some black and white artwork and wanted to add some colour to it in Photoshop. Multiply will be your best friend, especially for line art.
This line art will act as a background as we stack some colour on top, which will all act as blend layers. If we were to colour in her hair, skin, and lips, using the multiply blend mode is one of the easiest methods.
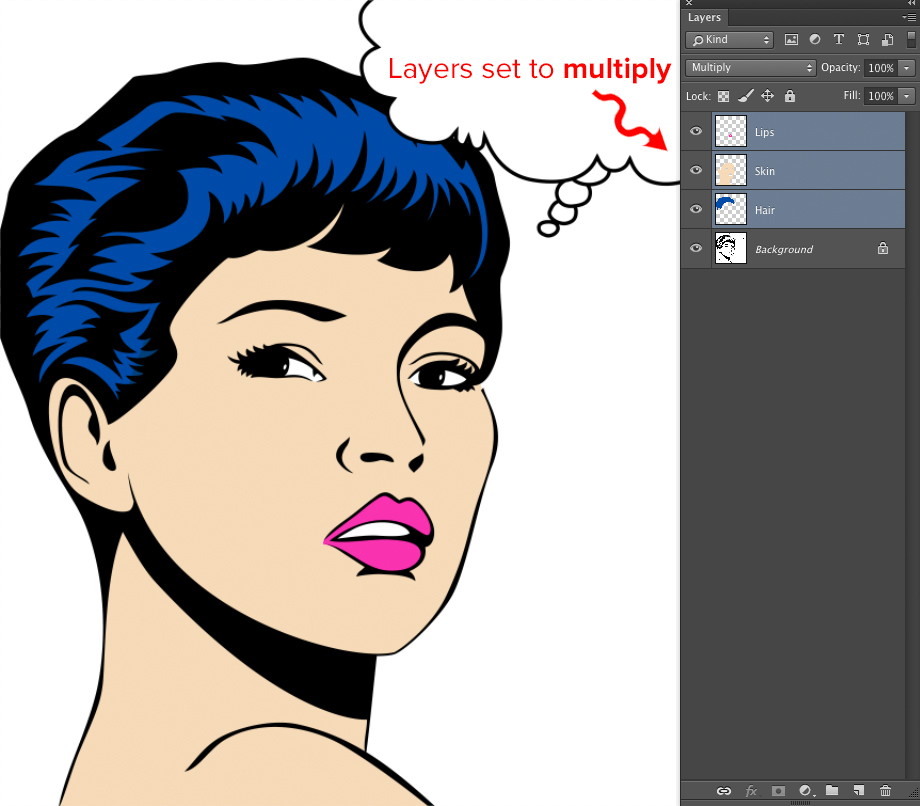
Use any form of painting sections that you want (brush, polygonal lasso tool, etc.) to paint each colour on a separate layer. In this case we’ll have 3 layers (hair, skin and then lips) to colour in.
I know the second photo looks really funny, but let’s not get distracted as there’s a reason for that messy colouring. I personally used the pen tool to select each part and as you can see, I did not have to be super accurate with the whole process because colours set to multiply do not appear on black anyways.
Blend mode: Screen
The blending mode screen processes the exact opposite of how the blend mode multiply does as screen is part of the lighten section. The lighter the pixels are on the screen layer, the more they will affect the layers below it, while the darker colours end up being more transparent. This time, black is known to have no effect while white prevails and is completely opaque in this blend mode.
This blend mode is great for making masks or glowing effects.
Example #1: Lighting Effects
Screen is largely used for light textures and glow effects.
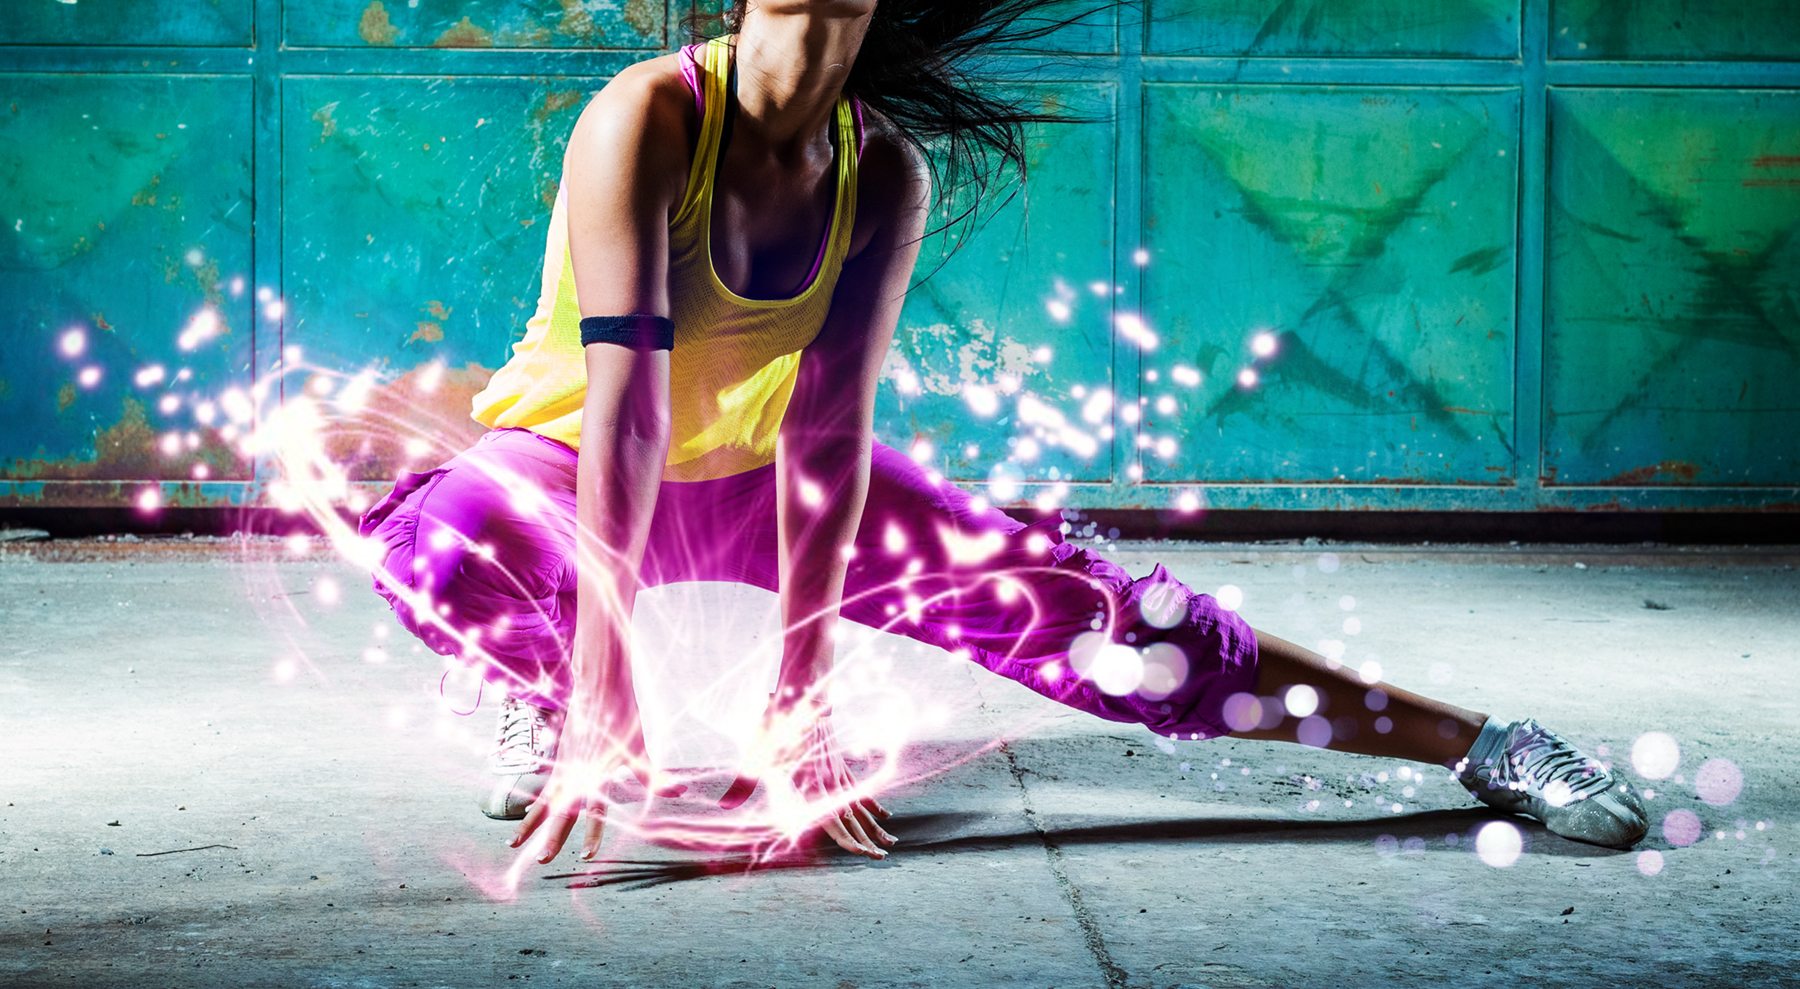
The two light textures that will be used as examples are the following and will act as the blend layers on top of the dancer who is acting as the background layer.


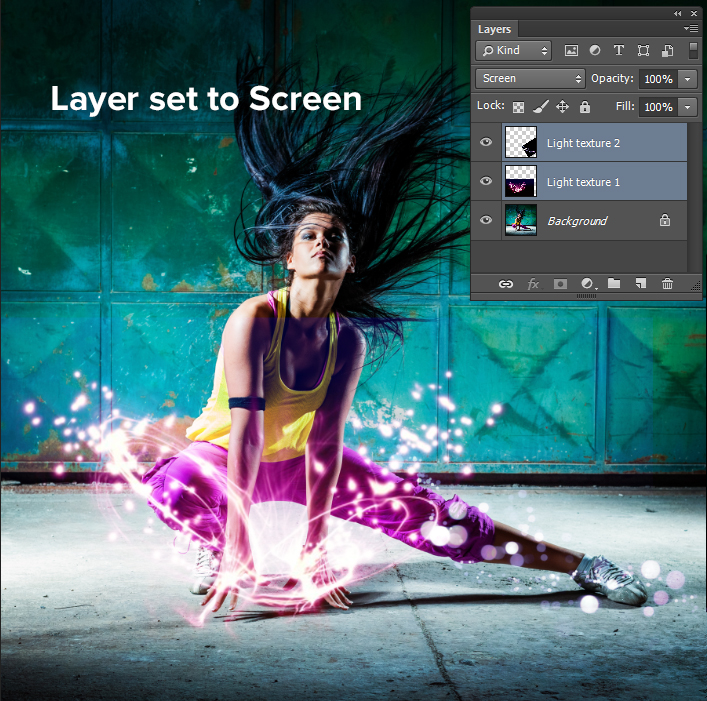
The two light textures were arranged how I saw fit and then changed to screen. So that the black would completely disappear. Now you end up with a much more interesting photo.
Example #2: Lighten photography
There are many ways to brighten a photo. Duplicating your image on the layers palette and setting it to screen. Is one way that is a tad limited, but very useful to know about. As it is extremely easy and quick to do.
Duplicate your layer that you want to be brightened and set it to screen to brighten it, and if it’s too bright you can lower the opacity next to the blend mode drop down. This method lightens up what is already bright while dark colours remain toned down.
The photo above is a good example of a layer being duplicated and set to screen. Because as you can see. The lighter pixels in a photograph are lightened, while the darker tones stay dark. Because there’s not much to lighten in the shadows. Just another quick way to brighten your photos up.
Blend mode: Overlay and soft light
Overlay is used for producing an intense amount of contrast. While soft light has the same effect except it’s much more subtle. In order to create contrast, these blend modes use the combination of screen on lighter pixels. (above 50% gray) While darker pixels (under 50% gray) use a multiplying effect.
Example #1: Add Contrast Photography
Similar to the screen demonstration above. You can duplicate your layer to add some quick and easy contrast to your photo.

The photo was duplicated in the layers palette and set to overlay. To add some quick contrast and produce the result on the right. Sometimes overlay ends up being too harsh on the photo and if so soft light works as a good alternative.
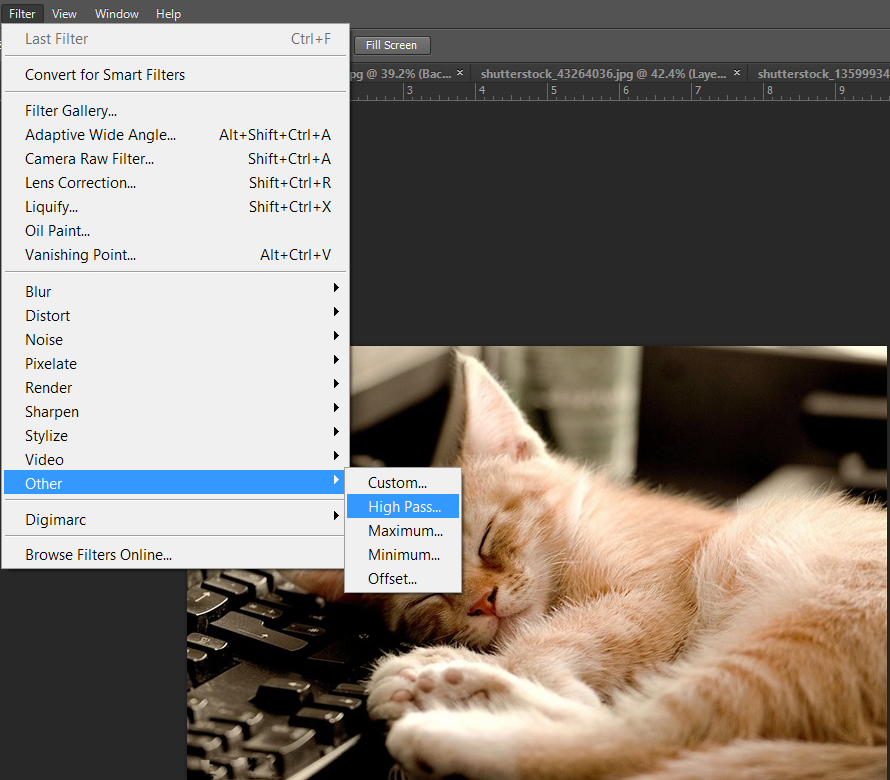
Example #2: High Pass Filter
The filter known as High Pass has become a useful alternative for sharpening images. It is exceptionally useful for photography that is of low quality. With noise because it targets hard edges first depending on how you adjust it.
First, duplicate your original layer and then set a high pass filter onto it. Then go to Filter>Custom>High Pass…
Adjust the radius so that you see outlines of what you want sharpened.
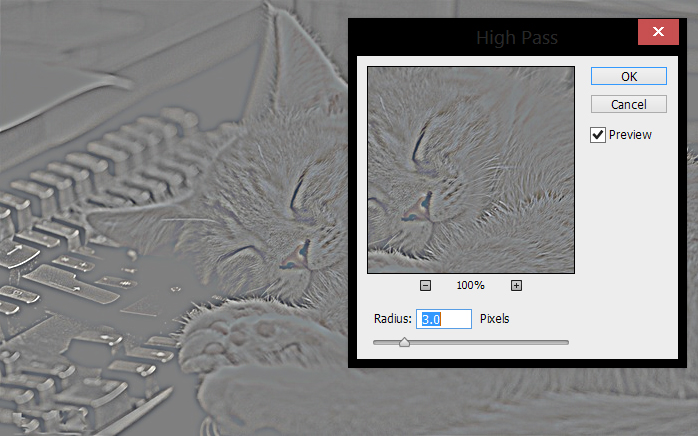
Below is a demonstration to see how the sharpness was improved using this method.

Blend mode: Luminosity
This blend mode keeps the luminance of the active layer and blends it with hue and saturation. (The color) of the composite view of the layers below. This results in the colors of the background layer being blended with the blend layer and replacing them.
Less often used, but has an important component to it that is a good tip. To keep in mind when working with adjustment layers. It is especially good to know for anyone adjusting photography or just regularly colour corrects.
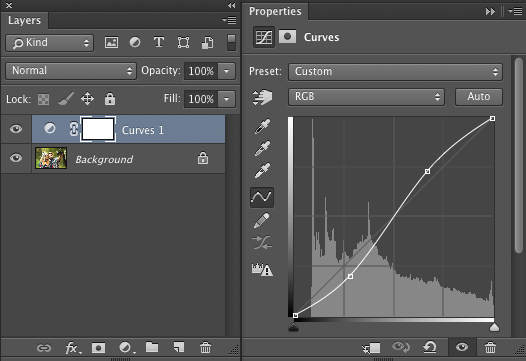
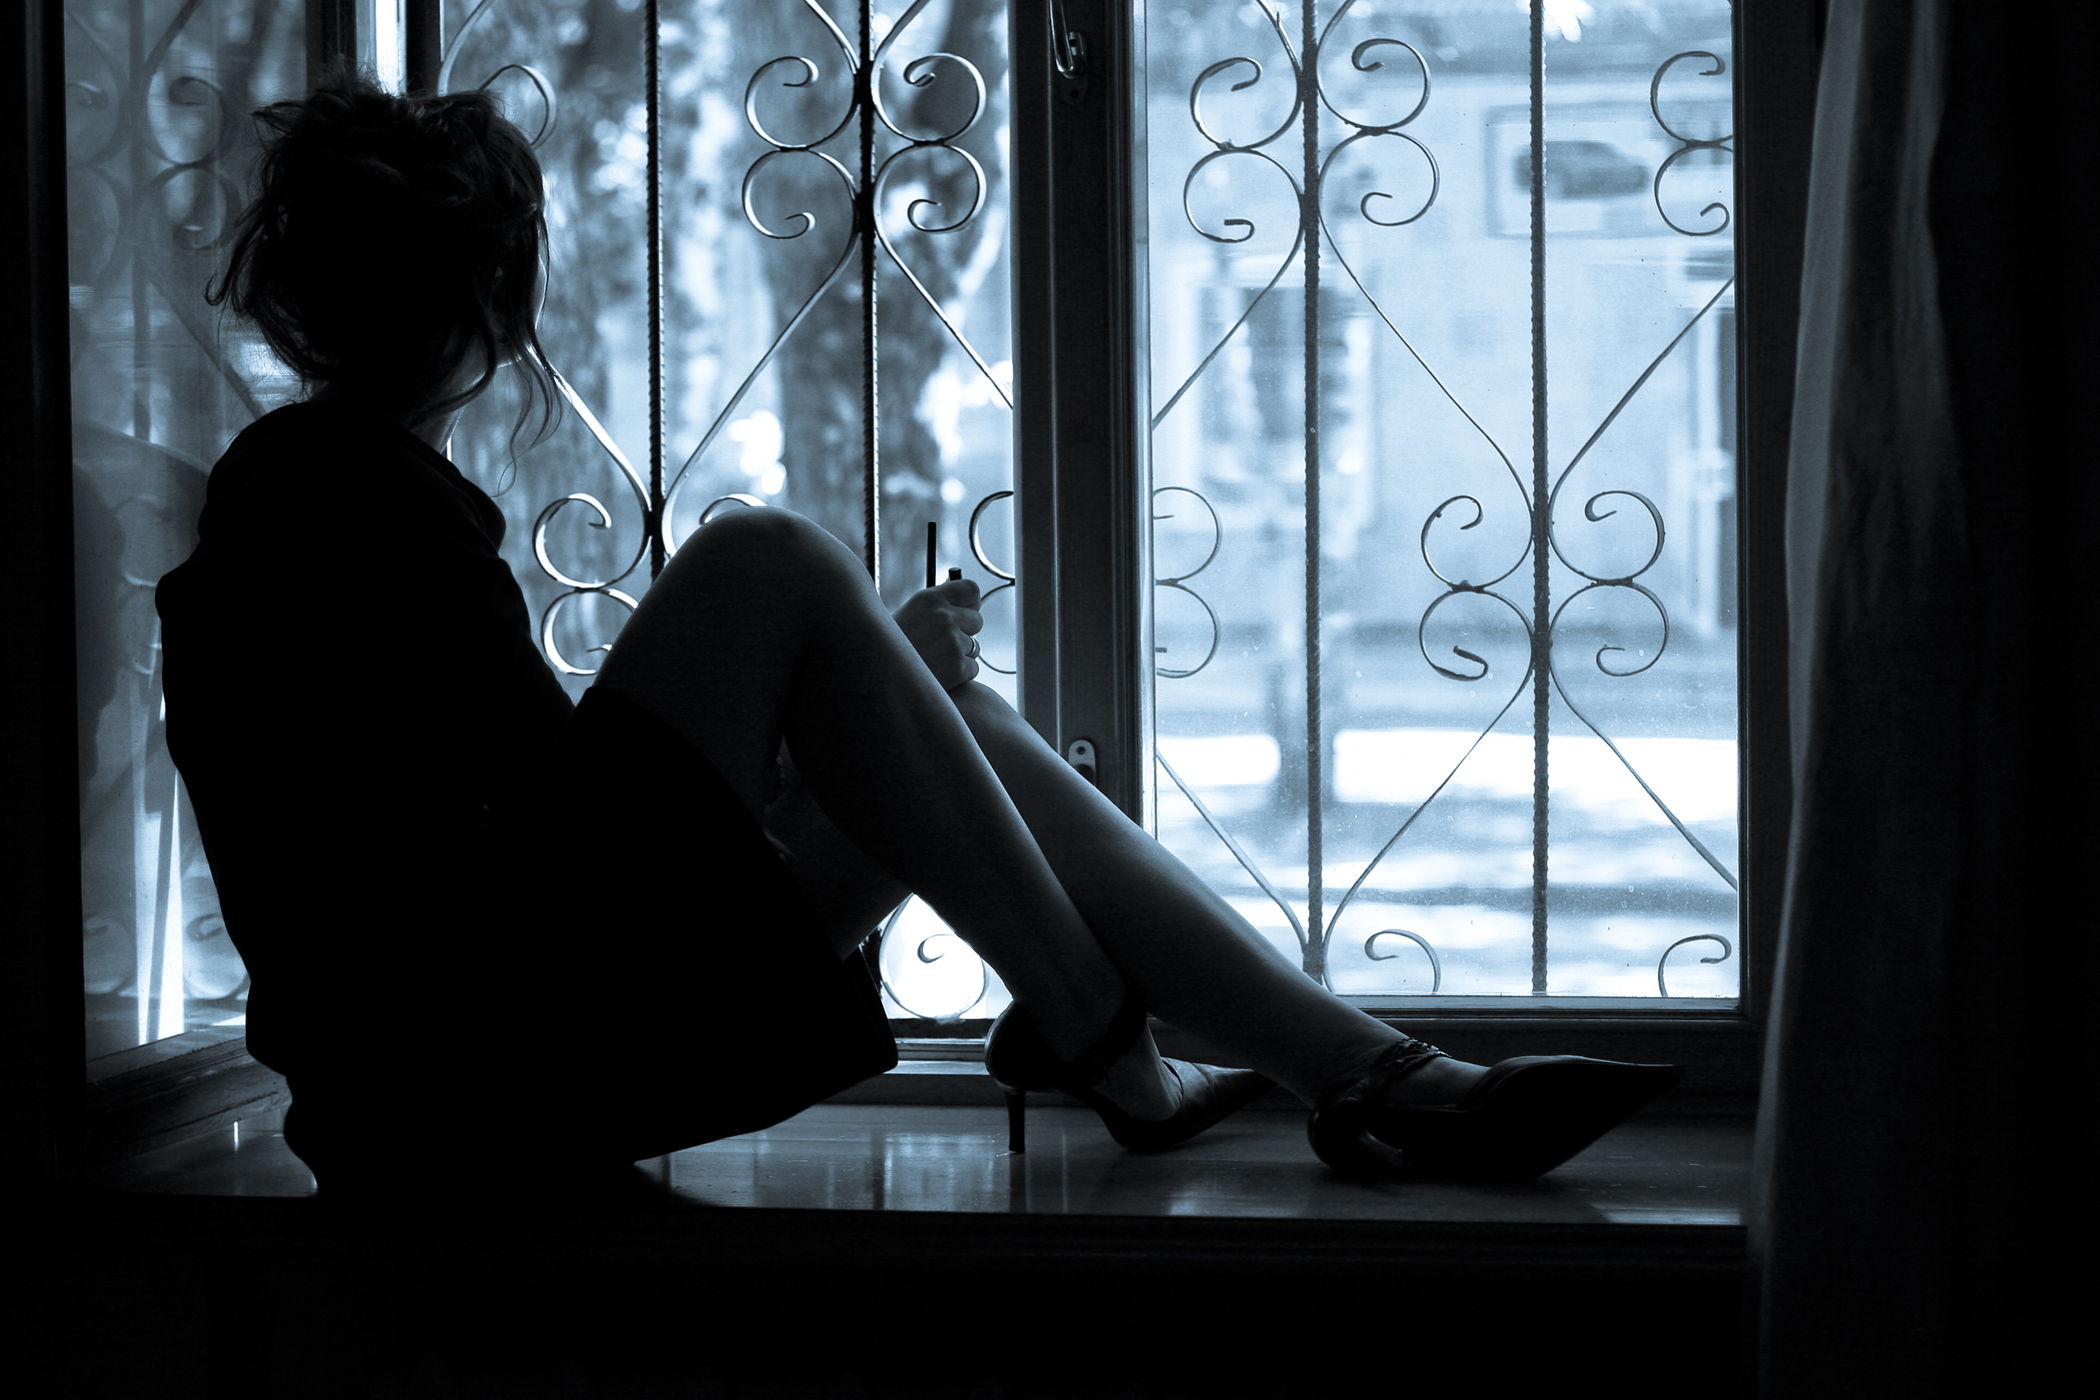
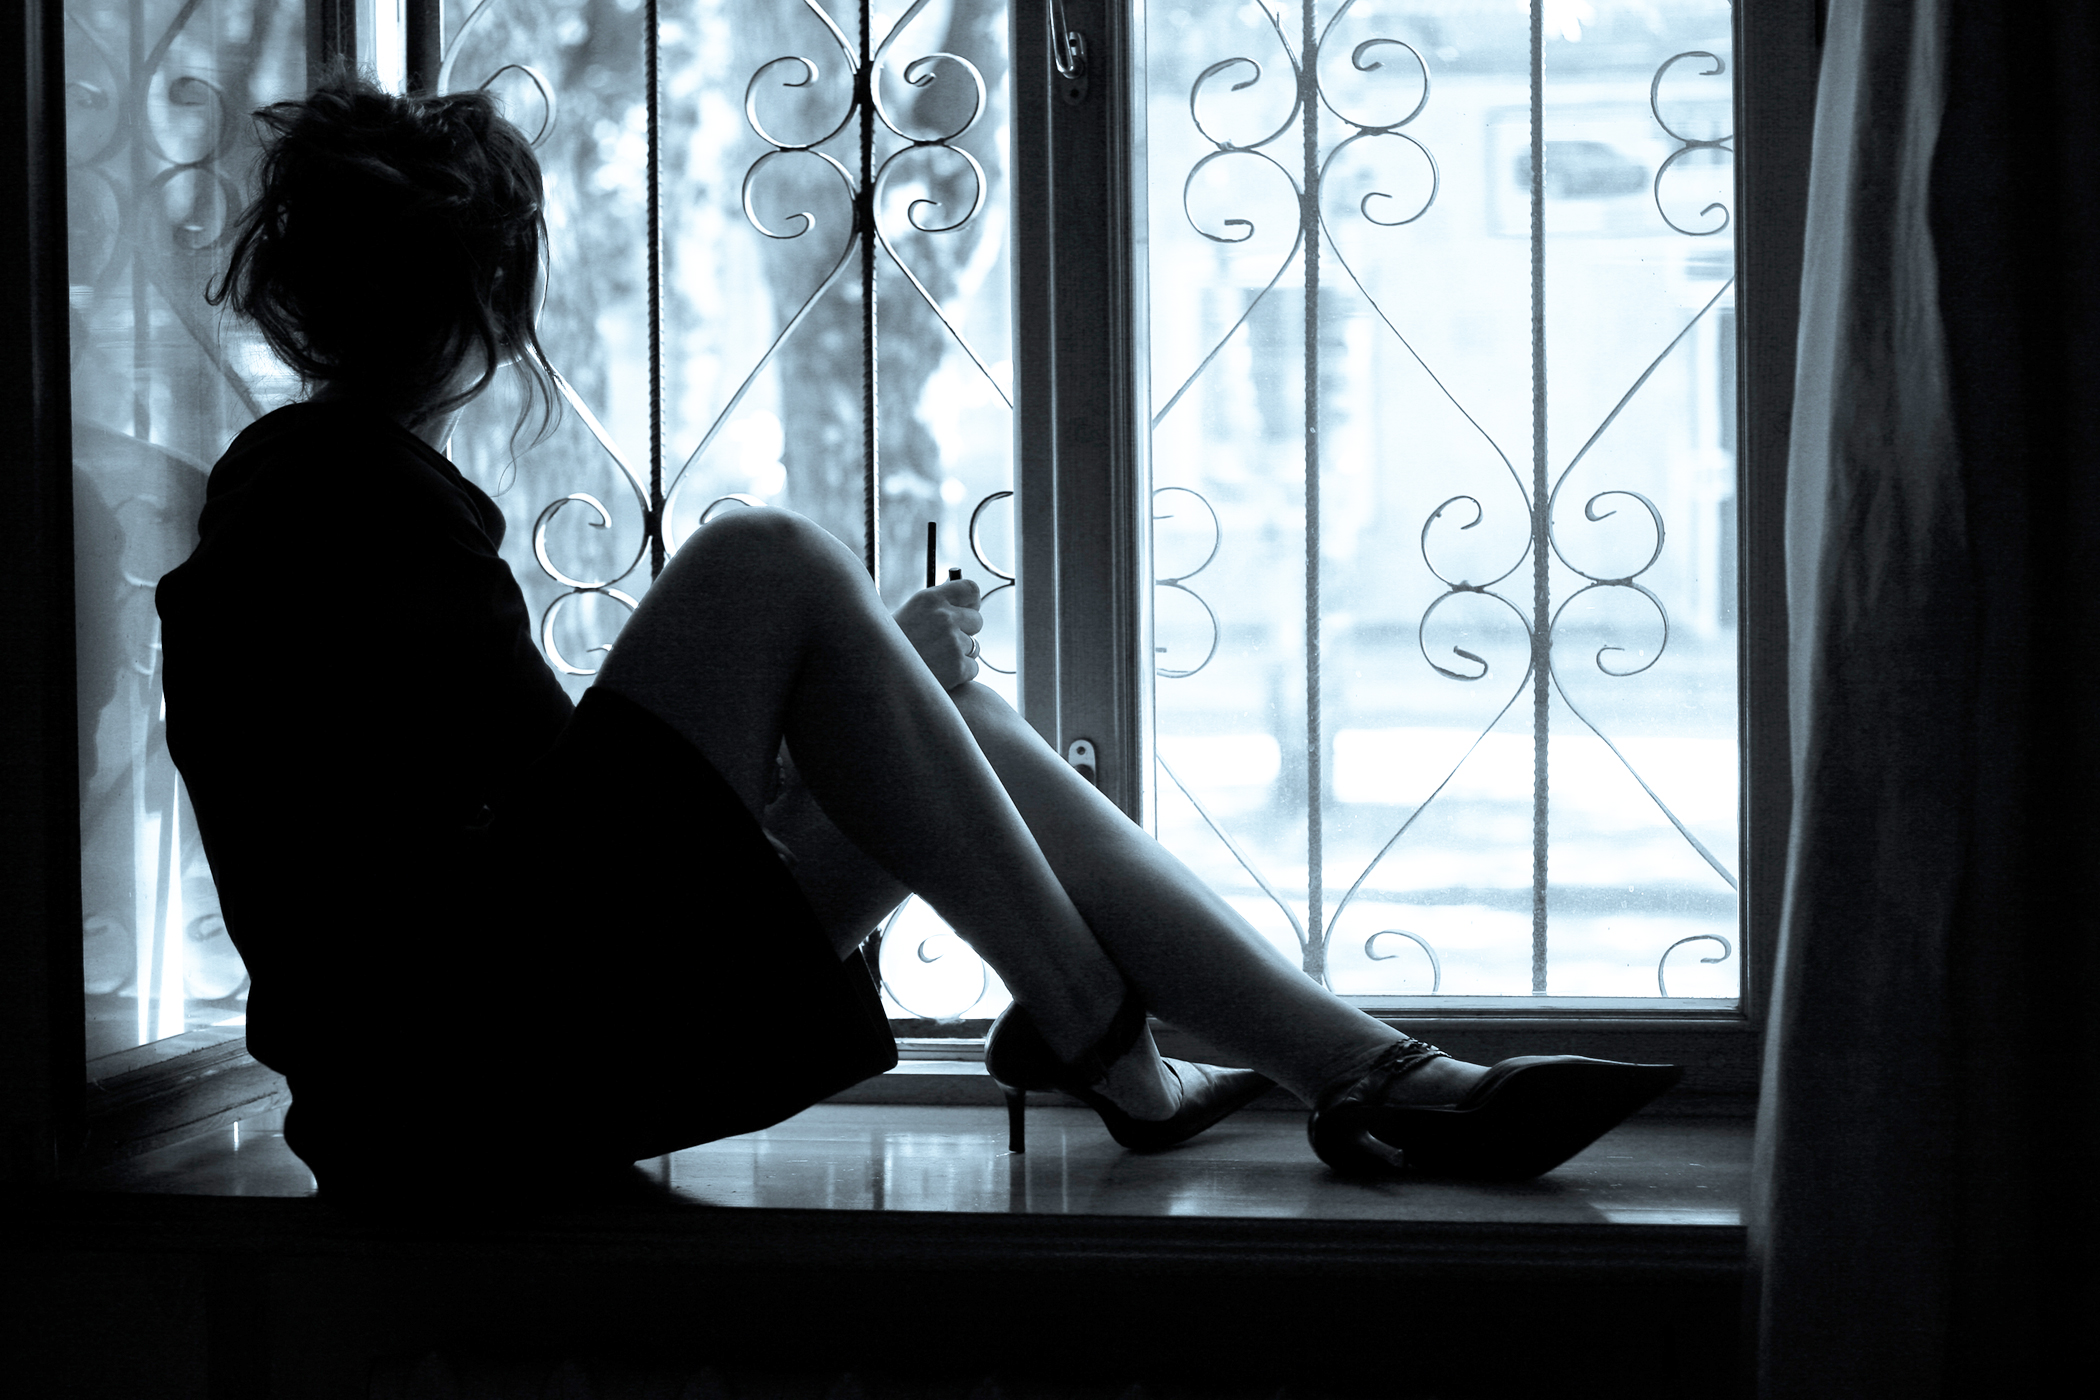
I wanted to add some harsh shadows and contrast to this image using a curves adjustment layer (Layer>New Adjustment Layer>Curves…). After adding the contrast the layer made the colour too saturated. The skin in the photo turned out a bright yellow. To fix this, simply go to the adjustment layer. Which will act as the blend layer and set it to luminosity. This way, the contrast is preserved while the colour of the pixels appear untouched.
Below is a gif to show the difference between the original photography. An adjustment layer added, and then the adjustment layer set to luminosity.
Final tip with blend mode: Pass-Through
Working with multiple layers can result in making groups of your layers by selecting all the layers in one group. It’s a good habit to get used to because it keeps everything nice and organized. So that your layers palette doesn’t look like a mess
.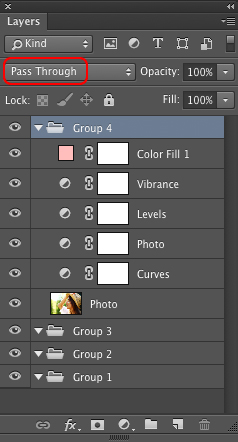
You’ll notice that the blend mode of groups is set to “Pass Through” by default. This means any layers with adjustments or blend modes will affect the layers below it. If you want for the layers in the group to only affect each other. Not the layers/groups below it, you must set it to Normal. So that the layer adjustments don’t pass through. Are you discussing web design or wanting to implement it on your site? Connect with us to get the conversation started.
That basically wraps up this post about the top 5 most useful blend modes, thanks for reading!
If you enjoyed this post, have a look at my post on New Web Design Trends 101 – Flat Design.